“OpenSCAD 条件及循环控制”的版本间差异
本页内容
(创建页面,内容为“和大多数编程一样一样OpenSCAD也支持if else for while等,基于这些我们可以创建国家复杂的模型。 == 三元表达式 == <sample title="" desc=""> $fa = 1; $fs = 0.4; module simple_wheel(wheel_radius=10, wheel_width=6) { rotate([90,0,0]) cylinder(h=wheel_width,r=wheel_radius,center=true); } $is_large = true; $wheel_radius = $is_large ? 20 : 10; simple_wheel(wheel_radius = $wheel_radius); </sample> == 条件表达式 == <…”) |
无编辑摘要 |
||
| 第46行: | 第46行: | ||
</sample> | </sample> | ||
需要注意的是变量名称需要改变,因为OpenSCAD是全局的变量,再编译后一个变量改变会导致前一个变量也改变。 | 需要注意的是变量名称需要改变,因为OpenSCAD是全局的变量,再编译后一个变量改变会导致前一个变量也改变。 | ||
== 循环语句 == | |||
接下来我们通过一个实例使用循环语句,这个例子复杂,最后的效果图如下。 | |||
<sample title="" desc=""> | |||
// 单位都是 mm | |||
// 宽度 | |||
width = 90; | |||
// 深度 | |||
deep = 112; | |||
// 高度 | |||
height = 34; | |||
// 壳宽度 | |||
shellWidth = 1.2; | |||
// | |||
hSplitCubeNum = 2; | |||
vSplitCubeNum = 3; | |||
// 横向隔离 | |||
module hSplitCube(pos){ | |||
translate([pos,0, 0]){ | |||
cube([shellWidth,deep,height]); | |||
} | |||
} | |||
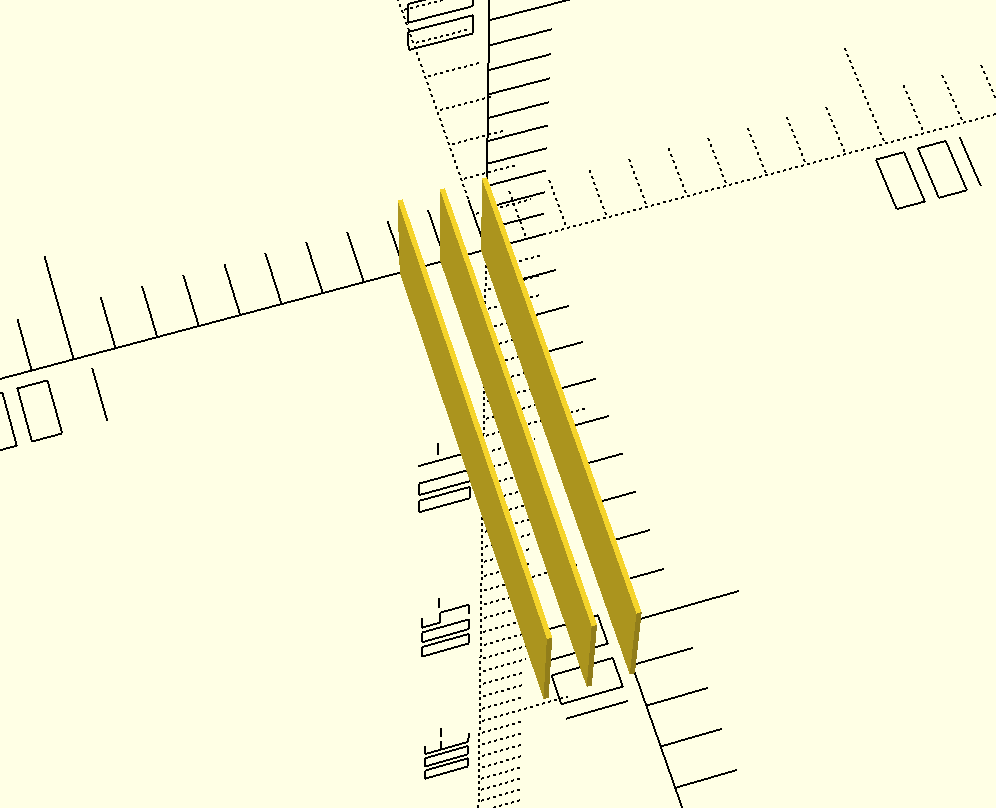
hSplitCube(0); | |||
hSplitCube(10); | |||
hSplitCube(20); | |||
</sample> | |||
[[文件:隔板.png]] | |||
<sample title="" desc="使用for循环可以轻松改变隔板的个数"> | |||
// 单位都是 mm | |||
// 宽度 | |||
width = 90; | |||
// 深度 | |||
deep = 112; | |||
// 高度 | |||
height = 34; | |||
// 壳宽度 | |||
shellWidth = 1.2; | |||
// | |||
hSplitCubeNum = 20; | |||
vSplitCubeNum = 3; | |||
// 横向隔离 | |||
module hSplitCube(pos){ | |||
translate([pos,0, 0]){ | |||
cube([shellWidth,deep,height]); | |||
} | |||
} | |||
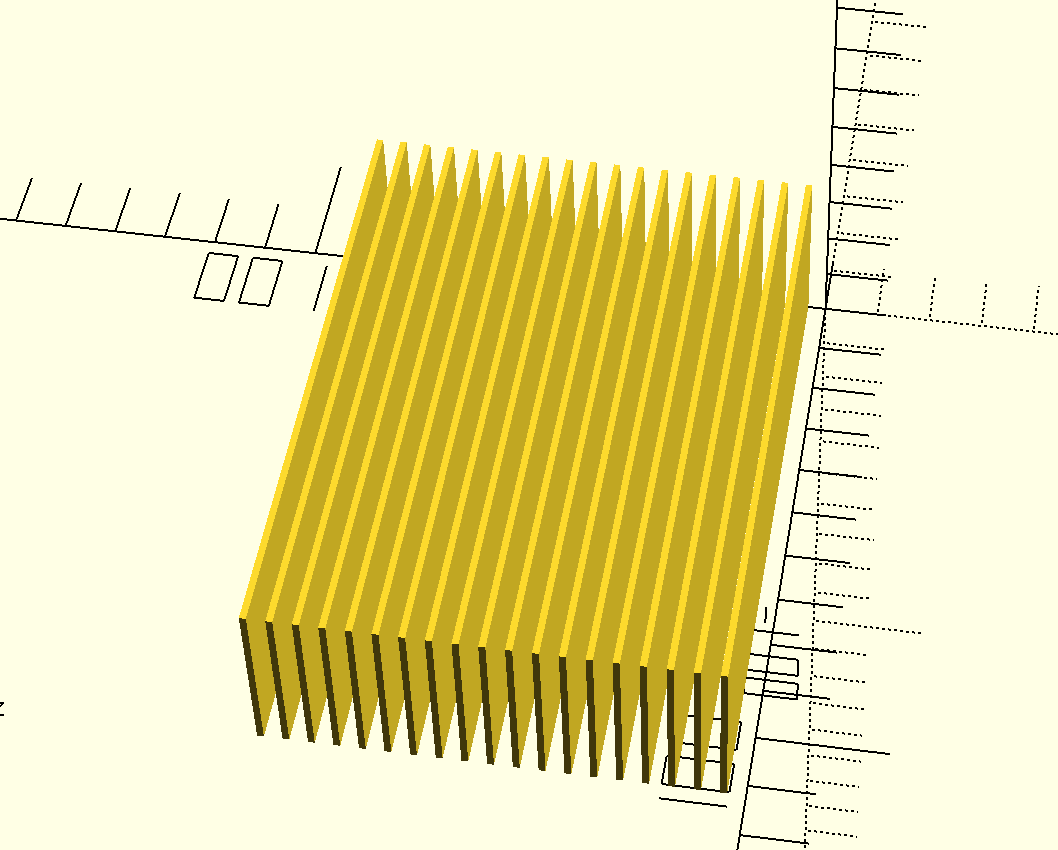
for(i=[1:1:hSplitCubeNum-1]){ | |||
echo(i); | |||
#hSplitCube(width/hSplitCubeNum*i - shellWidth); | |||
} | |||
</sample> | |||
[[文件:多个隔板.png]] | |||
<sample title="" desc="完整盒子模型 | |||
"> | |||
// 单位都是 mm | |||
// 宽度 | |||
width = 90; | |||
// 深度 | |||
deep = 112; | |||
// 高度 | |||
height = 34; | |||
// 壳宽度 | |||
shellWidth = 1.2; | |||
// | |||
hSplitCubeNum = 3; | |||
vSplitCubeNum = 3; | |||
// 横向隔离 | |||
module hSplitCube(pos){ | |||
translate([pos,0, 0]){ | |||
cube([shellWidth,deep,height]); | |||
} | |||
} | |||
// 竖向隔离 | |||
module vSplitCube(pos){ | |||
translate([0,pos, 0]){ | |||
cube([width,shellWidth,height]); | |||
} | |||
} | |||
color("#ccc"){ | |||
difference(){ | |||
cube([width,deep,height]); | |||
translate([shellWidth,shellWidth, shellWidth]){ | |||
cube([width - shellWidth*2, deep-shellWidth*2, height-shellWidth]);} | |||
} | |||
for(i=[1:1:hSplitCubeNum-1]){ | |||
echo(i); | |||
#hSplitCube(width/hSplitCubeNum*i - shellWidth); | |||
} | |||
for(i=[1:1:vSplitCubeNum-1]){ | |||
echo(i); | |||
#vSplitCube(deep/vSplitCubeNum*i - shellWidth); | |||
} | |||
} | |||
</sample> | |||
如果你有3D打印机,可以试着打印下该模型。下面是我打印的效果图。 | |||
2022年7月30日 (六) 09:43的版本
和大多数编程一样一样OpenSCAD也支持if else for while等,基于这些我们可以创建国家复杂的模型。
三元表达式
示例
$fa = 1;
$fs = 0.4;
module simple_wheel(wheel_radius=10, wheel_width=6) {
rotate([90,0,0])
cylinder(h=wheel_width,r=wheel_radius,center=true);
}
$is_large = true;
$wheel_radius = $is_large ? 20 : 10;
simple_wheel(wheel_radius = $wheel_radius);条件表达式
示例
$fa = 1;
$fs = 0.4;
module simple_wheel(wheel_radius=10, wheel_width=6) {
rotate([90,0,0])
cylinder(h=wheel_width,r=wheel_radius,center=true);
}
$is_large = true;
$wheel_width = $is_large ? 20 : 10;
simple_wheel(wheel_width = $wheel_width);
$is_large = false;
if($is_large == true){
$wheel_width2 = 20;
} else{
echo("---2---");
$wheel_width2 = 5 ;
}
translate([20,20,20]){
simple_wheel(wheel_width = $wheel_width2);
}需要注意的是变量名称需要改变,因为OpenSCAD是全局的变量,再编译后一个变量改变会导致前一个变量也改变。
循环语句
接下来我们通过一个实例使用循环语句,这个例子复杂,最后的效果图如下。
示例
// 单位都是 mm
// 宽度
width = 90;
// 深度
deep = 112;
// 高度
height = 34;
// 壳宽度
shellWidth = 1.2;
//
hSplitCubeNum = 2;
vSplitCubeNum = 3;
// 横向隔离
module hSplitCube(pos){
translate([pos,0, 0]){
cube([shellWidth,deep,height]);
}
}
hSplitCube(0);
hSplitCube(10);
hSplitCube(20);
示例
使用for循环可以轻松改变隔板的个数
// 单位都是 mm
// 宽度
width = 90;
// 深度
deep = 112;
// 高度
height = 34;
// 壳宽度
shellWidth = 1.2;
//
hSplitCubeNum = 20;
vSplitCubeNum = 3;
// 横向隔离
module hSplitCube(pos){
translate([pos,0, 0]){
cube([shellWidth,deep,height]);
}
}
for(i=[1:1:hSplitCubeNum-1]){
echo(i);
#hSplitCube(width/hSplitCubeNum*i - shellWidth);
}
示例
完整盒子模型
// 单位都是 mm
// 宽度
width = 90;
// 深度
deep = 112;
// 高度
height = 34;
// 壳宽度
shellWidth = 1.2;
//
hSplitCubeNum = 3;
vSplitCubeNum = 3;
// 横向隔离
module hSplitCube(pos){
translate([pos,0, 0]){
cube([shellWidth,deep,height]);
}
}
// 竖向隔离
module vSplitCube(pos){
translate([0,pos, 0]){
cube([width,shellWidth,height]);
}
}
color("#ccc"){
difference(){
cube([width,deep,height]);
translate([shellWidth,shellWidth, shellWidth]){
cube([width - shellWidth*2, deep-shellWidth*2, height-shellWidth]);}
}
for(i=[1:1:hSplitCubeNum-1]){
echo(i);
#hSplitCube(width/hSplitCubeNum*i - shellWidth);
}
for(i=[1:1:vSplitCubeNum-1]){
echo(i);
#vSplitCube(deep/vSplitCubeNum*i - shellWidth);
}
}如果你有3D打印机,可以试着打印下该模型。下面是我打印的效果图。

